Find out more about inflatable air awnings with our handy guide. If you have any further questions, please let us know and we will guide you through your queries.
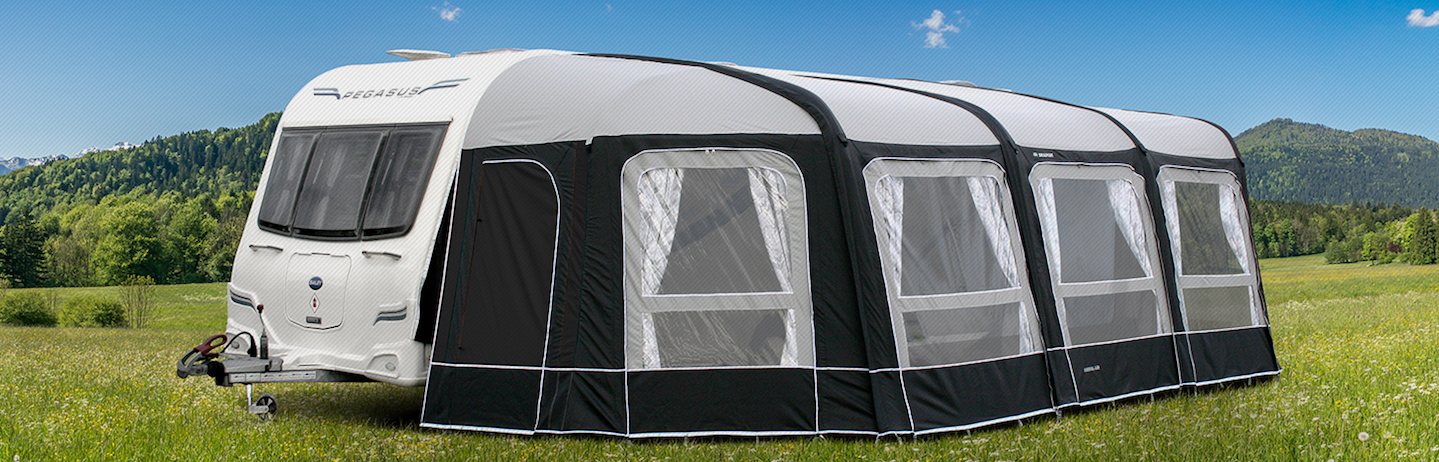
Inflatable air awnings. What you need to know!
Q. Can my Inflatable Awning lose pressure over time?
A. Yes. Due to the ‘serviceable’ valve and the very nature of the TPU inner-tube, the air system is much like a bicycle tyre and may need topping up every 3-4 days. The loss of pressure may vary from base unit and extension to extension. Your bellows foot pump will often suffice in whatever unit requires re-pressurising.
Q. Can I over pressurise my Inflatable Awning when using the 12v Electric Pump?
A. Yes. For those who have invested in the optional 12v electric pump it is important that you follow the instructions and set the pumps red dial to between 30 and 35. This will deliver a final pressure of approx. 0.3Bar which is equal to 4.5PSI. The ‘TenCate’ carrier which houses the TPU Bladder are both tested to work well beyond this working pressure to allow for any rapid increase in temperature during Summer time. This potential increase in pressure from exposure to sun has already been factored into our calculation, so please make sure your pump is at the correct setting from the start.
Q. Can I over pressurise my Air Awning using the bellows foot-pump.
A. No. The foot-pump will deliver approximately 5ltrs of air with each press and is only capable of inflating to a maximum of 0.3Bar. It will simply be impossible to press down beyond this pressure.
Q. Why do some of my air beams appear slightly bowed?
A. Due to the extra wide air beams that we use, we have created the sturdiest inflatable awning/porch available on the market today and designed to absorb most of the energy that any strong wind will blow at it, and all this without having to rack up the internal pressure too high! As a result it is quite normal for some air beams to appear slightly bowed, particularly those that are under stress such as the upper roof beams and side legs which are being pulled down and inwards by the attached side panels. The air beams are flexible to a degree, but rest assured they are doing their job.
Q. My awning is new and appears to be leaking water, is this normal?
A. Yes. All awnings particularly when new can experience some degree of leaking through the sewn seams. This will improve over time the more the awning is rained on and then sun dried. (Please see “The Weathering Process” for full explanation)
Q. What is 'The Weathering Process'?
THE WEATHERING PROCESS
All new awnings will leak in rainy conditions. This is a normal and necessary process, which is called “Weathering”. If the awning experiences initial light showers of rain then it is likely the weathering procedure will pass un-noticed. If subjected to moderately heavy showers on early outings, it is very likely that you will notice it. When the awning is sewn in the factory, the machine needles penetrate the fabric leaving a hole once that needle has retracted. The thread that is left behind within that hole is of a lesser diameter than the needle which carries it (it has to be, to pass through the eye within the needle). When the awning gets wet the thread is designed to swell and fill that stitch hole swelling a little more each time it gets wet. Once fully weathered the end result is a good water repellent seam.
A very important part of the weathering process involves the awning being thoroughly dried out each time, before the next rain fall. Light rain is ideal for this purpose but if subjected to very heavy rain when new, considerable leaking may be experienced! The “drying out”, is absolutely essential in order for the weathering process to take affect. Please be aware that there are no limits to how long this may take, as it is entirely dependant on weather conditions and how often the awning is used. We would only recommend the use of a seam sealer as a very last resort. It is far more effective, if the awning is allowed to weather naturally.
There is a method of avoiding the need for weathering by welding a heat transfer tape to the inside of the seam. This method however has repercussions as the awning ages in so much as the water still penetrates the sewing thread but is then unable to dry out, culminating in the thread rotting very quickly, hence this method is avoided, longevity of our product being our main priority.
It is possible that leaking may be more prevalent in different sections of the awning especially when one of modular design. Our threads are treated during their manufacture and it is possible there are slight inconsistencies in the amount of that treatment from batch to batch of thread. As modular models have sections manufactured at different times, it is unlikely they will have been sewn with thread from the same batch.
Useful Tip: A very simple and effective way or speeding up the weathering process would be to hose down the seams of the awning prior to use. If this is done on a dry day with no rain forecast, this can be done several times allowing the awning to dry out thoroughly each time.
CONDENSATION
No awning is “waterproof”. However, all fabrics used in the manufacture of our awnings are “waterproofed”. Coated materials NEVER actually leak at all, but with persistent rain in very windy conditions, partial leakage through the SEWN SEAMS ONLY is inevitable. This should not be confused with condensation (a common misunderstanding).
NOTE any fabric, which is coated, is susceptible to CONDENSATION, especially at times of the year when hot days and chilly nights are experienced. In addition to this, condensation can also be experienced in rainy conditions. Condensation will form as water droplets on the underside of the roof, which will grow in size and eventually run down the awning roof where it will sit on the poles situated at the point of the seam. This often gives the appearance that the rain is coming in at the seam. Please also note that condensation can often be found on the framework itself, particularly steel and alloy. The warmer air in the awning against the much colder framework causes this.
IT IS IMPORTANT THAT YOUR AWNING IS VENTILATED AS MUCH AS POSSIBLE, WHENEVER POSSIBLE.
Q. Can the pressure of the air beams in my awning vary in hot and cold weather?
A. Yes. It is said that for every 5.5 degree celsius change in ambient air temperature there will a change of approximately 2% in (psi) pressure.
Subsequently it is perfectly normal for the air beams to feel softer on a chilly evening/morning and much harder in the hot afternoon sun.
For those who have invested in the optional 12v electric pump it is important that you follow the instructions and set the pump's red dial to between 30 and 35. This will deliver a final pressure of approx. 0.3Bar which is equal to 4.5PSI. The ‘TenCate’ carrier which houses the TPU Bladder are both tested to work well beyond this working pressure to allow for any rapid increase in temperature during Summer time. This potential increase in pressure from exposure to sun has already been factored into our calculation, so please make sure your pump is at the correct setting from the start.
Q. Do the Side Panels of my Modul-Air Porch Awning need to be fitted and removed in a particular way?
A. Yes! This is very important when fixing side panels or adding additional extensions to a Modul-Air Awning. The ‘Golden Rule’ is, all zips are ‘closed’ and sides and extensions fitted by taking the zip puller from ground level at the front of the awning and taking back to the caravan’s awning rail. To remove side panels and extensions, simply reverse this order. So……..
ZIP IN - GROUND UPWARDS. ZIP OUT - ROOF DOWNWARDS.
Q. Do the Extensions that came with my Full Modul-Air Awning need to be fitted and removed in a particular way?
A. Yes! This is very important when fixing additional extensions to a Modul-Air Full Awning. The ‘Golden Rule’ is, all zips are ‘closed’ and and extensions fitted by taking the zip puller from ground level at the front of the awning and taking back to the caravan’s awning rail. To remove extensions, simply reverse this order. So……..
ZIP IN - GROUND UPWARDS. ZIP OUT - ROOF DOWNWARDS
Q. How do I know when my valves are in the OPEN or CLOSED position before inflating my awning?
A. The Spring Pin which is set within each valve has 2 positions.
DOWN/OPEN - This will allow air to freely pour out. Ensure all spring pins are set down/open within the valve when deflating your awning for then rolling and packing away.
UP/CLOSED – This will allow air to be pumped in, but the NON-RETURN VALVE will not allow air out.
To select position, simply press down with thumb and quarter turn
CLOCKWISE – UP/CLOSED. ANTI-CLOCKWISE – DOWN/OPEN.
TIP! Leave screwing on the valves large black dust-cap until inflated. If you’ve inadvertently left a valve pin open during inflation, you’ll clearly hear air pouring out!
Q. My 12v Electric Pump changes tone and sounds louder after a minute or so. Is this normal?
A. Yes. Your Electric Pump is a ‘2 Stage Pump’ consisting of a Turbine and then Piston Pump. The Turbine Pump (sounds like a hairdryer) is what you will hear first for a minute or so. As the Inflatable Awning gently begins to inflate the Electric Pump will soon detect ‘back pressure’ and it’s at this point that there will be a pause momentarily, before a louder hoarse sounding Piston Pump kicks in. Let this Piston Pump run for the duration (2-3 minutes approx.), and the pump will automatically stop once the predetermined pressure has been reached. You can now disconnect the pump from your inflatable awning.
Q. Can I change the Crocodile Clips on my Electric Pump to a Cigar Lighter Fitting?
A. NO!
We do not recommend changing the crocodile clips. When the pump is in piston mode, when it gets louder, it is drawing approx. 20 amps, way too much for cigar lighter sockets period. Extending the lead can also create problems due to the draw and the weight of wire would have to be much greater than it is now.
My recommendation would be to use the 12v leisure battery of the caravan, or as I do, top draw the car up alongside the Caravan, adjacent to the awning, pop the bonnet and connect to my car battery, or as is the case for me, the jump start terminals as my battery is hidden away somewhere.
By the time you have re-parked your car the battery should be back in its original state of charge.
Q. What Modul - Air Base Unit & Extensions do I need to make a Full Awning?
A. Once you know the Awning Size of your caravan. See 'AWNING FINDER' under 'SUPPORT' Simply check against the list shown below.
| 2019 MODUL-AIR - SUGGESTED CONFIGURATIONS | |||||||
| AWNING SIZE | BASE | EXTENSION #1 | EXTENSION #2 | EXTENSION #3 | |||
| 780 | MODUL-AiR 260 | + | FRONT 305cm | + | |||
| 810 | MODUL-AiR 260 | + | FRONT 325cm | + | |||
| 840 | MODUL-AiR 260 | + | FRONT 325cm | + | |||
| 870 | MODUL-AiR 330 | + | FRONT 305cm | + | |||
| 900 | MODUL-AiR 260 | + | FRONT 325cm | + | 90 cm | ||
| 915 | MODUL-AiR 260 | + | FRONT 305cm | + | 130 cm | ||
| 930 | MODUL-AiR 260 | + | FRONT 305cm | + | 130 cm | ||
| 945 | MODUL-AiR 260 | + | FRONT 325cm | + | 130 cm | ||
| 960 | MODUL-AiR 330 | + | FRONT 305cm | + | 90 cm | ||
| 975 | MODUL-AiR 330 | + | FRONT 325cm | + | 90 cm | ||
| 990 | MODUL-AiR 330 | + | FRONT 305cm | + | 130 cm | ||
| 1005 | MODUL-AiR 330 | + | FRONT 305cm | + | 130 cm | ||
| 1020 | MODUL-AiR 330 | + | FRONT 325cm | + | 130 cm | ||
| 1035 | MODUL-AiR 330 | + | FRONT 305cm | + | 165 cm | ||
| 1050 | MODUL-AiR 330 | + | FRONT 325cm | + | 165 cm | + | |
| 1065 | MODUL-AiR 330 | + | FRONT 325cm | + | 165 cm | + | |
| 1080 | MODUL-AiR 330 | + | FRONT 305cm | + | 130 cm | + | 90 cm |
| 1095 | MODUL-AiR 330 | + | FRONT 305cm | + | 130 cm | + | 90 cm |
| 1110 | MODUL-AiR 330 | + | FRONT 325cm | + | 130 cm | + | 90 cm |
| 1125 | MODUL-AiR 330 | + | FRONT 305cm | + | 165 cm | + | 90 cm |
| 1140 | MODUL-AiR 330 | + | FRONT 325cm | + | 130 cm | + | 130 cm |
| 1155 | MODUL-AiR 330 | + | FRONT 305cm | + | 165 cm | + | 130 cm |
| 1170 | MODUL-AiR 330 | + | FRONT 305cm | + | 165 cm | + | 130 cm |
| 1185 | MODUL-AiR 330 | + | FRONT 325cm | + | 165 cm | + | 130 cm |
Question not here?
Enquire NowBradcot UK Ltd - 01274 306811
Customer Services: [email protected]
Bradcot UK Ltd, 8-12 Jubilee Way, Thackley Old Road, Shipley, WEST YORKSHIRE, BD18 1QG
